(true story: I was buying some fabric at a local thrift store, the lady said that the fabric would be perfect once it was ironed, then looked back at me and said--I quote "you probably don't know what that is honey, an iron--" REALLY?? so this is proof--I've got one and I know how to mis-treat it!!)
Nothing better than a good pair of scissors--I keep mine hidden, sometimes from myself-- :)
Burlap--
Just had to take a pic for proof that I really got for a quarter--can you say AWESOME thrifting :)
Fabric in Bright colors---These were 2 for a quarter---GIDDY!!
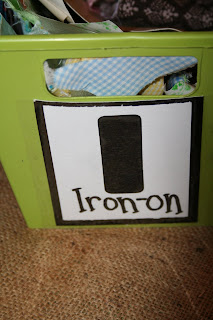
or you could just go to the bucket of fabric already ready to be ironed on--
Oh wait--you don't have that bucket in your Craft Closet???
Then you'll need some no-sew iron on magic :)
(Unless you sew, in which case---this tutorial is not for you)
Now--have you got everything??
Is the iron hot??
Did you put a towel under the burlap so the table doesn't get burnt?
Ok--ready--
Iron the burlap--
Cut some leaves---no---there is no template--I'm sure you could google, bing, or yahoo one, but I just cut a leaf out--Remember-The NESTER says"It doesn't have to be perfect to be beautiful" and I LOVE embracing that---it's just a leaf-they're not perfect---So just cut out a bunch--
If you have a random stash of pre-prepped fabric that is just itchy to be ironed on, then skip this step other wise you've got to cut small pieces of fabric fusing to use to attach the leaves
Then randomly arrange your leaves
Oh-wait, hurry move that one, one more time...
And then iron away...
Not sure if you can see this , but I frayed both of the long edges, because I like a "messy" look--please don't feel obligated to follow suite
And then you have to have something just a fun and full of "whimsy" to go in the middle
So just go the craft closet, get out a letter and smack some fabric leaves on it with some spray adhesive!! I followed with some matte-clear spray paint for good measure--and popped it in here:
This is my $2 pedastal bowl--painted the bowl and funky wooden thing, and glued them together:
Oh wait----just add a few more leaves----
Gotta love a fun, easy, thrifty craft :)
ENJOY!!
I Linked up with: Paisley's Passions and SomeDay Crafts and HandyMan, CraftyWoman and YesterdayonTuesday


2 comments:
stopping by from jenna's journey! this is CUTE! i just recently started working with fabric and i cannot believe you got all that stuff for SO cheap!! :) i'm going to be keeping an eye out for fabric when i go thrifting. thanks so much for sharing this tutorial!
This came out so great! Thanks for linking it up to our Wicked awesome wed link party.
Post a Comment